Banff Winter Wildlife Photography: Best Opportunities, Camera Settings and Safety Tips
Winter is a rewarding time to photograph wildlife in Banff National Park, but it is not the season for a grizzly bear shoot. Elk, bighorn sheep, deer, red squirrels and resident birds stay active while most of the bears are in their dens. Snow simplifies backgrounds, shows up animal tracks and gives an ordinary encounter a mountain setting you won't get in summer. The trade-offs are short days, cold camera batteries, icy ground and wildlife that can be hard to find.
Plan a winter photography outing that still works if no animals appear. Choose accessible viewpoints, bring a telephoto lens or binoculars, give yourself plenty of time, and treat every wildlife sighting as a bonus. If an elk stands too far off for a close-up, a wide frame with the snowy peaks behind it can be the better picture, and the safer one.
This guide covers where to photograph wildlife around Banff from November to February, camera settings for snow and moving animals, cold-weather equipment, the rules for photographing wildlife responsibly, and when a guided photography outing is a good idea.
Is Banff good for wildlife photography in winter?
Yes, especially if you enjoy environmental wildlife photography, where the animal is part of a bigger winter landscape. The lower, fairly accessible valleys around Banff let you look for animals without heading into remote backcountry, although no species or location is guaranteed.
| Subject | Winter expectation | How to approach it |
|---|---|---|
| Elk | Among the more realistic large-mammal subjects | Search by eye from legal roadside viewpoints and public paths; use a long lens |
| Bighorn sheep | Possible on open, windswept slopes | Scan distant hillsides instead of walking towards them |
| Deer | Possible near forest edges and in valley habitat | Look for soft side-light and simple backgrounds |
| Red squirrels and small woodland birds | Good subjects for patient watching | Short walks, quiet observation, a modest telephoto |
| American dippers | Possible near open, moving river water | Watch from safe public paths; use a fast shutter speed |
| Coyotes | Possible but unpredictable | Keep a big distance and don't follow |
| Wolves, moose and other elusive mammals | Unpredictable and often rare | Be delighted if you see one; don't plan a day around them |
| Grizzly or black bears | Usually in their winter dens | Don't book a winter trip expecting bear photographs |
These are general photographic opportunities, not the odds of a sighting. For a species-by-species introduction, see what animals you can see in Banff in winter.
The calendar is for the Twilight Wildlife & Alpine Lakes Sunset Safari, an evening tour into the low sunset light that asks you to bring a camera and changes its route to follow the day's wildlife sightings: 4.6★ from 70+ reviews, from $142, park entry included. It is a sightseeing tour, not a photography workshop.
Where to try winter wildlife photography around Banff
No list of places can promise an animal every day. Habitat, road safety and seasonal access are better planning tools than online claims about exact wildlife "hotspots". The places below are public areas where you can combine scenery with patient wildlife watching. None of them promises a sighting or gives you permission to approach an animal.
1. Vermilion Lakes: winter scenery with a chance of wildlife
Vermilion Lakes, just outside Banff town, is a strong choice when you want mountain and wetland scenery even on a day with no animals. Snowy banks, reedbeds, the changing light on Mount Rundle and, in some conditions, patches of open water give you plenty of compositions.
You may find birds or mammals in the right habitat, but a sighting someone posted yesterday doesn't mean the animals will be there when you arrive.
Photo ideas:
- Use a wide lens to frame the peaks above a snowy foreground.
- Look for backlit grasses and dark trees against fresh snow.
- If a bird or mammal is visible from a safe public spot, let its surroundings give the picture context instead of moving closer.
- On dull days, try minimalist images of reeds, snow and mist.
Winter caution: lake edges and frozen surfaces can be dangerous, and Parks Canada does not monitor natural ice for safety. Stay on accessible, established routes and never walk onto the ice to improve a composition.
2. The Bow River and the paths around Banff town
The Bow River corridor is another practical option if you are staying in town. Open, moving water can attract birds such as the American dipper, a small dark bird that dives into cold streams for food, and chickadees and other resident birds turn up along the wooded paths.
A riverside session works well when the roads are icy or you only have an hour. Look for reflections, snow-laden branches, moving water and a bird silhouetted against a pale bank. You don't need to chase wildlife through the undergrowth to make an interesting picture.
Photo ideas:
- For a dipper or another moving bird, start at around 1/1000 second and adjust for its activity and the light.
- For calmer water-and-landscape images, use a slower shutter speed only when you have a secure position well back from the bank.
- Expose carefully to keep detail in both white snow and dark feathers.
Winter caution: paths can be icy, so bring traction cleats. Keep off unstable riverbanks and well back from open water.
3. Bow Valley Parkway: landscape first, wildlife only when you can stop safely
The Bow Valley Parkway (Highway 1A) runs through forest and valley habitat between Banff and the Lake Louise area. It can be beautiful in winter, but it is still a road, not a drive-through photography hide.
A distant animal seen from a legal viewing area can make an excellent environmental portrait. Never stop on a blind corner, leave a car in a driving lane, or walk towards an animal for a photograph. Obey any sign that prohibits stopping: Parks Canada can set up temporary no-stopping zones to protect wildlife, and those signs override any sightseeing plan.
The parkway also has seasonal restrictions at other times of year, so check the conditions again if you are planning a late-winter or spring visit.
Photo idea: a long-lens landscape with a small animal inside a forested valley often tells a stronger story than a heavily cropped close-up.
4. Lake Minnewanka and the eastern road: know the closure
The Lake Minnewanka area sits in Banff's lower-elevation montane zone, which matters a great deal to wildlife. You can combine the lake views with a general look for animals from the places that are open to the public at the time.
The western section of the Minnewanka Loop Road, though, closes to motor vehicles from November to May to protect a wildlife corridor. Don't follow a summer driving map round the full loop in winter. Check the Parks Canada closure page before you go, and never enter a restricted area for a photograph.
The shoreline and water can be especially dramatic in winter. As everywhere else, don't step onto natural ice just because other people have.
For more on the area, see our Lake Minnewanka guide and Banff winter wildlife tours.
5. Lake Louise: superb winter landscapes, not a reliable wildlife safari
Lake Louise is one of the most photogenic places in the Canadian Rockies in winter. The mountains, the snowy shoreline, the frozen lake and the shifting clouds make it well worth bringing a camera.
Treat Lake Louise mainly as a landscape location, though, not a dependable place for elk, moose or wolves. It is busy, which also makes quiet wildlife watching hard. If you are only there for a few hours, a wide-angle lens is usually more useful than a huge wildlife telephoto.
Don't assume you can walk anywhere on the frozen lake: ice conditions vary, and the park does not monitor natural ice. Follow the local advisories and stay in the approved areas. Our Lake Louise and Moraine Lake guide covers the visit itself.
Should you drive the Icefields Parkway to photograph animals?
The Icefields Parkway has world-class mountain landscapes, but it is no place for a casual winter wildlife hunt. The weather changes fast, the road can close, services are limited and visibility can be poor. Parks Canada requires winter tires or chains on the Icefields Parkway from November 1 to March 31, and whenever the road is covered in snow or ice at other times.
If you have the winter-driving experience, a prepared vehicle, enough daylight and good road conditions, the drive can be rewarding for landscapes. For a short wildlife outing, the easy-to-reach locations around Banff usually make more sense. Don't drive the parkway in severe weather in the hope of seeing wolves or a bear.
Check Parks Canada's winter driving guidance and Alberta 511 before any long winter drive.
Other ways to see Banff's winter landscapes
Photographers in Banff National Park also join evening wildlife safaris to Lake Minnewanka, Two Jack Lake and the Hoodoos, ride the Banff Gondola to the summit of Sulphur Mountain, walk the frozen falls on Johnston Canyon ice walks, go out on stargazing tours, and take winter sightseeing trips to Lake Louise.
What lens do you need for wildlife photography in Banff?
A telephoto lens is the most useful thing you can carry, because ethical wildlife photography means leaving animals at a safe distance. A long focal length also compresses the snowy mountains behind your subject.
| Lens or device | Best use in Banff's winter landscape | Limitation |
|---|---|---|
| 24-70mm / phone wide camera | Wildlife as a small part of a mountain scene; general winter landscapes | Not suited to close portraits of distant animals |
| 70-200mm | Larger animals in their setting, where distance and visibility allow | Often too short for small birds or very distant mammals |
| 100-400mm or 150-600mm | Distant elk, bighorn sheep and deer, and bird photography | Heavy; harder to hand-hold in low light |
| 300-500mm prime | Wildlife work where optical quality and reach come first | Less flexible when the framing changes fast |
| Phone with a true optical telephoto | Good environmental images in bright conditions | Digital zoom is no substitute for a long lens |
You don't need to buy a 600mm lens to enjoy Banff. An interesting animal in its snowy habitat makes a fine photograph. If the animal is too small in the frame, switch to a landscape instead of trying to close the gap.
Longer lenses matter most for small birds. If extra weight is a problem, pack the longest lens you can comfortably and safely use with gloves on. Binoculars help you find animals without pointing the camera at every distant shape.
Full-frame or crop-sensor camera?
A crop-sensor body can make it easier to fill the frame with a distant subject on a given lens, while full-frame cameras often do better in low light, depending on the models. Neither changes the safety distances. Choose the equipment you can work confidently while standing on snow or ice.
Should you carry a tripod?
A tripod helps with landscapes, twilight scenes and still subjects at a distance. It is less handy when animals move unpredictably or when you need to shift position without blocking a narrow public path.
A monopod takes some of the strain of a big telephoto. If you use a tripod, set it up only where that is allowed and where it won't cause a hazard on the path or the roadside, and never block an animal's route with your gear.
Camera settings for Banff wildlife in snow
Winter wildlife photography brings two common problems: moving animals, and bright snow next to dark fur or feathers. Set your shutter speed first, then adjust the aperture and ISO to the light you actually have. The settings below are starting points and won't suit every condition.
| Subject or situation | Shutter speed to try | Aperture to try | ISO approach |
|---|---|---|---|
| Elk or sheep standing fairly still | 1/500-1/1000 sec | f/5.6-f/8 | Auto ISO with a sensible cap |
| Walking or trotting mammals | 1/1000-1/1600 sec | f/4-f/8 | Raise ISO as needed |
| Birds taking off or flying | 1/1600-1/2500 sec or faster | Widest practical aperture | Expect a higher ISO |
| Small perched bird | 1/800-1/1600 sec, depending on movement | f/5.6-f/8 | Balance noise against blur |
| Wide snowy landscape | As the light and support allow | f/8-f/11 | Often a low ISO on a tripod |
At 400mm or longer, shutter speed and a steady technique matter. When an animal is far away, haze and drifting snow can soften the image however good your lens is.
1. Use continuous autofocus for movement
For animals that might move, switch to continuous autofocus (AF-C or your camera's equivalent). Subject detection or animal-eye tracking helps when it works, but snowy branches or dark backgrounds can confuse it, so be ready to choose a focus zone yourself.
For a still animal against a clean background, a single focus point is often more dependable than automatic scene detection. Shoot a few short bursts instead of holding the shutter down for minutes.
2. Watch your exposure in snow
Camera meters tend to render a bright, snowy scene too dark. If your snow looks grey, try positive exposure compensation, starting at around +2/3 to +1 stop, and check the result. Some scenes need more and some less.
Don't dial in a fixed +2 stops for every frame. A dark elk filling much of the picture, direct sunlight, fog or reflective ice can all change the right exposure considerably. Check the histogram and the highlight warning so you don't lose the detail in the snow.
With black feathers against bright snow, decide what matters most. You may keep the detail in the bird and let some of the brightest background go almost white.
3. Choose shutter speed before low ISO
A sharp but noisy image usually tells the story better than a clean, blurred one. Raise the ISO when you need to, especially in dim winter light. Modern noise reduction rescues many high-ISO pictures, but it can't fully undo motion blur.
4. Shoot RAW if you plan to edit
RAW files give you more room to correct white balance and recover exposure in high-contrast scenes. Snow looks blue in the shade and yellow at sunset, and that colour isn't always a problem. Aim for a natural result; not every snowbank needs to be pure white.
5. Keep a safe frame in mind
A wildlife photo doesn't have to fill the frame with an animal's face. Try compositions where the subject takes up only part of the picture: an elk beneath Mount Rundle, a tiny bird against a snowy spruce, or bighorn sheep below a sweeping ridge. Pictures like these show habitat, scale and season better than a tight crop.
Winter camera gear checklist
The cold affects you and your equipment, so pack for the weather as well as the photograph.
Camera and optics
- Camera body or phone, charged and tested before you leave
- A telephoto lens or optical zoom; a wide-angle lens if you have one
- A lens hood to keep snowflakes and stray light off the front element
- Spare batteries in an inside pocket, close to your body
- A spare memory card and a lens cloth
- Binoculars, to find animals without approaching them
- A tripod or monopod, if you want one for safe, stationary shooting
Cold-weather protection
- Warm, waterproof boots with good grip, and traction cleats
- Insulated layers, a hat and weatherproof outerwear
- Thin liner gloves for the camera controls, with warmer mittens between shots
- Extra layers, water and food for longer outings
- A phone with offline maps and enough battery for an emergency
- A headlamp if you might be out near dusk
Parks Canada's winter walking guidance recommends traction aids and proper winter supplies. Even a short walk turns miserable if you stand still waiting for a bird while the temperature drops.
How to prevent battery and condensation problems
Cold cuts how much a camera battery can deliver, so keep spares in a warm inner pocket. Switch off battery-hungry features between photo opportunities, but try not to keep pulling your gloves off to change settings.
Before you take a cold camera into a warm room, put it in a closed camera bag or a sealed bag and let it warm up slowly before it meets the humid indoor air. That cuts condensation on the cold surfaces. Don't breathe on cold glass or scrub frost off it.
When it is snowing, use the lens hood and a simple rain cover. Weather sealing varies by camera and lens and is not the same as waterproofing, so follow the manufacturer's temperature and moisture guidance.
Photography in November, December, January and February
Banff wildlife photography in November
November is a month of change. The valleys may have patchy snow, the roads can turn icy, and the first hard cold spells shift where animals go. Some grizzlies may still be active early in the month, but don't look for or approach bears. As more bears den, turn to the year-round wildlife and the winter landscapes.
Photo theme: brown autumn grasses, early snow and dark evergreen forest.
Banff wildlife photography in December
December brings short days and long spells of low-angle light. Sunrise and sunset colours can be beautiful, but you have less time to move between places. For most visitors, a compact outing with one or two accessible stops works better than an ambitious driving loop.
Photo theme: backlit snow, elk or sheep in open valley habitat, birds around moving water, and winter scenery.
Banff wildlife photography in January
January is deep winter, often with hard cold and difficult driving or walking. Snow can tidy up a busy background dramatically. Your priorities are warm hands, working batteries and a route you can finish safely.
Photo theme: minimalist landscapes, frost, snow textures and dark animal silhouettes against pale surroundings.
Banff wildlife photography in February
February has a little more daylight than December and January and still feels fully wintry. The weather stays changeable, and cold snaps, snow and limited road access are all still possible. It is a good month to practise both wider environmental portraits and telephoto landscapes.
Photo theme: animals framed by snowy peaks, winter birds and changing light over the valleys.
For trip planning beyond photography, see our month guides to Banff in November and Banff in December; our best time to visit Banff guide covers the whole year.
The wildlife photography rules you must follow
Never make an animal move, change its behaviour or feel cornered for a photograph. Winter wildlife is often saving energy, and disturbing it has a real cost even when the picture looks peaceful.
Parks Canada's current viewing distances are:
| Animal | Minimum distance |
|---|---|
| Elk, deer, bighorn sheep and moose | 30 metres (about 100 feet) |
| Bears, wolves, cougars and coyotes | 100 metres (about 330 feet) |
| Birds and small mammals | Enough space that they don't react or move away |
These are minimum distances, not targets to get as close as you can. You may need more room if an animal is alert, has young with it, is in a narrow spot or is near traffic. If your presence changes what the animal is doing, you are too close.
Follow these rules on every outing:
- Never feed, bait, entice, whistle at or call animals to make them look at the camera. Feeding and disturbing wildlife is illegal in the national park.
- Don't follow tracks towards an animal, a den or a resting place. Photograph tracks where you find them, but don't treat them as an invitation to go after the animal.
- Stay in your vehicle to watch roadside wildlife. If you stop, use only a safe, legal place, turn on your hazard lights, take a quick photo and carry on. Move along if a wildlife traffic jam starts to build.
- Don't surround or crowd an animal. Keep its route clear, and never use another photographer to push it into your composition.
- Don't fly a recreational drone. Recreational drones are prohibited throughout Banff National Park.
- Don't publish exact den locations or sensitive wildlife sites. Share the park and the experience, not details that could draw disturbance.
- Check wildlife warnings and area closures. A public trail or viewpoint can be closed temporarily to protect animals or visitors.
The official guidance is on Parks Canada's Safely view wildlife and drone rules pages.
Do you need bear spray for winter photography?
Yes: Parks Canada recommends carrying bear spray on winter walks, knowing how to use it and staying bear-aware. Most bears den through the winter but can wake for short periods, and other large animals stay active. Keep the spray where you can reach it, not buried under your camera gear; a camera and telephoto lens are not safety equipment. Our winter bear spray guide explains how to carry it in the cold.
If you are photographing from a car or on a guided tour, follow the operator's and the park's instructions for that situation. Never use bear spray to make an animal move for a photograph.
A practical half-day Banff winter photography plan
This plan sticks to safe, accessible scenery, with wildlife as a possibility you can't schedule.
Before you leave: check Parks Canada's trail and closure notices, the local forecast, the daylight hours and the road conditions, and confirm your route is open. Set up your camera and charge your spare batteries indoors.
Stop 1: early light near Vermilion Lakes. Go for a landscape first, and scan from suitable public spots for birds or distant mammals. If no animals turn up, concentrate on frosted reeds, trees and the mountain light.
Stop 2: a public Bow River viewpoint or a maintained path near Banff. Look for resident birds, snow patterns, moving water and environmental wildlife pictures. Don't approach an animal or leave a designated path for a better angle.
Stop 3: coffee and a look through your pictures. Warm up, change batteries if you need to and check whether your snow exposures are balanced. A short break often produces better photos than hours standing still in extreme cold.
An optional extra stop: if the weather, the daylight and the driving conditions all allow, try another officially accessible viewpoint, never a restricted road or a site advertised as a guaranteed animal location.
The plan works without a long drive and doesn't depend on seeing a bear, a wolf or a moose. For a fuller day, pair it with a winter sightseeing tour such as the evening Twilight Wildlife & Alpine Lakes Sunset Safari.
Should you book a guided Banff winter photography tour?
A guided outing makes sense if you would prefer not to drive icy mountain roads, want help choosing locations as conditions change, or would like hands-on camera tuition. Not every photo tour is a wildlife tour, though, and not every wildlife tour is built for serious photographers.
Option 1: a private landscape photography workshop
A private workshop suits photographers who want to work on winter exposure, composition, sunrise planning or camera technique. Rocky Mountain Photo Adventures, for example, advertises year-round private photography guiding and winter landscape sessions, and its Three Peaks private workshop lists winter locations including Vermilion Lakes, Lake Louise and Emerald Lake.
Best for: learning to photograph winter mountains, with wildlife only if an ethical opportunity comes up. It is no guarantee of a sighting.
Option 2: a custom photography guide
Banff Photo Workshops & Tours (Dani Lefrancois) offers customisable private photography instruction around Banff. This kind of option suits photographers with specific skills to work on, or who prefer a slow pace.
Ask before you book: Is there a winter departure on your exact date? Is transport included? Is the focus landscape or wildlife? What equipment and winter clothing will you need?
Option 3: a scenic wildlife sightseeing tour
On a general Banff winter wildlife tour you travel in comfort with a guide who explains the habitats and animals. It suits travellers who want an introduction to the park and a few photographs along the way more than long sessions with one subject. The Twilight Wildlife & Alpine Lakes Sunset Safari goes out into the evening light, and Discover Banff & Its Wildlife is a three-hour morning loop of Bow Falls, the Hoodoos and Lake Minnewanka.
Ask before you book: How long are the stops? Can you safely use a longer lens? Is there any photography tuition? Does the tour really run in winter, or only in summer?
Operators change their itineraries, prices, pickups and dates, so go by the operator's own current booking page before you plan around availability. No responsible tour should promise a wild grizzly in midwinter.
Five common winter wildlife photography mistakes
1. Expecting a grizzly bear in January. Grizzlies generally den through the winter. If bears are your main subject, plan for the warmer viewing season instead of a winter trip; our guide to when grizzly bears hibernate in Banff has the calendar.
2. Driving between too many locations. Winter travel is slower, the days are shorter and the weather is less forgiving. One good morning in a small area usually produces more than a rush between distant valleys.
3. Underexposing every snowy picture. Camera meters turn snow grey. Use the histogram, check the highlight detail and set exposure compensation for the scene.
4. Carrying a heavy lens without enough warm layers. Standing still to take photos feels colder than walking. A spare battery and proper gloves can matter more than another lens.
5. Putting the picture ahead of the animal. A close-up is never worth crowding an elk, blocking a sheep's escape route or causing a traffic hazard. A wider photograph is often more memorable, and more ethical.
Wildlife Tours for a Winter Photo Day
Neither is a photography workshop and neither can promise an animal. Choose the evening tour for the sunset light, or the morning loop for a shorter trip with a guide who explains what you are seeing.
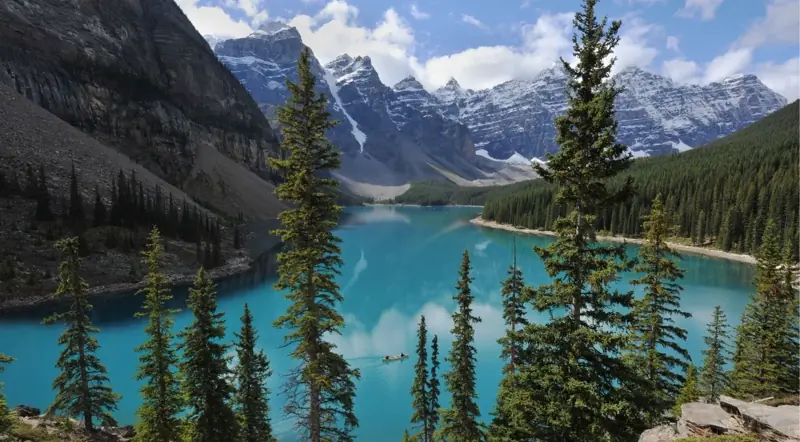 Sunset light · wildlife stops
Twilight Wildlife & Alpine Lakes Sunset Safari
Timed for the evening, when the light is low and warm, with wildlife stops only where it is safe to pull over. The operator asks you to bring a camera; food isn't included.
GetYourGuide · ★ 4.6 (70+ reviews) · From $142 Check availability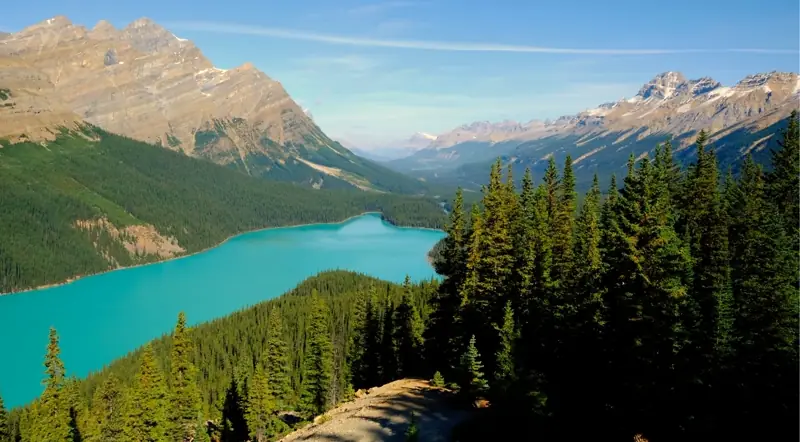 Mornings · all year
Discover Banff & Its Wildlife
A three-hour loop of Bow Falls, the Hoodoos and Lake Minnewanka. Booked on Viator, it can't be refunded.
On Viator · ★ 4.6 (230+ reviews) · From US$65 Check availabilityBanff Winter Wildlife Photography: Common Questions
Locations, lenses, shutter speeds, snow exposure, drones, photographing from the car and whether a photo tour is worth it.
Where is the best place for wildlife photography in Banff in winter?
No single spot is dependable. The lower valleys around Banff, public viewpoints along the Bow River and roads that are legally open all give you a chance at birds or larger mammals. Vermilion Lakes is especially good for combining big scenery with a chance of wildlife, although sightings can't be guaranteed.
Can you photograph elk in Banff in December?
Yes, elk are active all year and you may find them in suitable valley habitat in winter, but any one sighting is unpredictable. Use a telephoto lens and stay at least 30 metres away, further if the animal reacts to you.
What wildlife can photographers expect in Banff in January?
Elk, bighorn sheep, deer, squirrels and resident birds are far more realistic subjects than grizzlies. Coyotes are possible, while wolves, moose and the elusive predators are much harder to predict. Expect a varied day, not a checklist of guaranteed species.
Is February good for wildlife photography in Banff?
Yes, if you come prepared for winter. February brings snowy scenery and slowly lengthening days, and elk, bighorn sheep and the winter birds are still active. Cold weather and closures can still upset your plans.
What camera lens is best for Banff wildlife?
A telephoto such as a 100-400mm is a versatile choice for distant large mammals, and longer lenses help with small birds. You can still make strong environmental pictures with a shorter lens. Never cut the required distance from wildlife to make up for limited zoom.
What shutter speed should I use for elk in snow?
For an elk standing fairly still, try around 1/500 to 1/1000 second, adjusting for your lens length and any movement. Go up to about 1/1000 to 1/1600 second or faster for walking or running animals. Check sharpness in the field and raise the ISO when you need to.
How do I stop snow looking grey in photographs?
Use exposure compensation and check the histogram. Starting at roughly +2/3 to +1 stop often helps in a mostly bright snow scene, but it is not a fixed rule. Protect the highlights and adjust for the animal's colour and the light.
Can I use a drone to photograph winter wildlife in Banff?
No. Recreational drones are prohibited in Banff National Park, and commercial drone use is tightly restricted and needs approval. Use a camera from a permitted public location instead.
Can I photograph wildlife from my car?
Yes, from a safe, legal position. Parks Canada recommends staying inside your vehicle when you come across roadside wildlife. Never stop in traffic, on a blind bend or in a posted no-stopping zone, and take a quick photo and move on if a queue starts to build.
Is a Banff winter photography tour worth it?
It can be, especially if you want help with landscape technique, local knowledge or winter transport. Choose a photography-specific guide for detailed camera work, because a general wildlife sightseeing tour usually leaves less time to compose each shot. Confirm the winter schedule and exactly what is included before you pay.
Are bears hibernating in Banff in winter?
Most grizzly and black bears are in their dens in the heart of winter, although some can wake for short periods. A grizzly photograph is not a realistic goal for a standard November to February visit, and winter hikers still need to be bear-aware.
Do I need to be an experienced photographer?
No. A phone, good winter clothing and an eye for small details can be enough. Start with landscapes, resident birds and careful watching from public areas. Composition and patient fieldcraft matter as much as expensive equipment.
Make the wildlife part of the landscape
The best winter wildlife photographs from Banff don't need a rare animal or a dramatic chase. An elk in a quiet valley, a dipper at the river's edge or a small bird on a snowy spruce can say more about winter in the Rockies than a close-up taken at the animal's expense.
Plan your day around the weather, the light and safe access. Bring a telephoto lens if you have one, give wildlife space, and come home with a set of pictures that shows the whole winter ecosystem, even if the bears stay out of sight.
If you are planning a trip more than a dedicated photo expedition, see Banff winter wildlife tours and our comparison of the best winter wildlife tours in Banff for the wider choice of guided sightseeing.
Continue planning
Sources and further reading
Checked in November 2026. Wildlife movements, road access, tour schedules and winter conditions change, so check the latest Parks Canada advisories and the operator's details before you set out.
- Parks Canada: Safely view wildlife: minimum distances, roadside viewing and photography conduct.
- Parks Canada: Animals in Banff National Park: species and montane habitat.
- Parks Canada: Winter in Banff National Park: winter weather, ice, wildlife and bear awareness.
- Parks Canada: Winter walking: traction, equipment and winter conditions.
- Parks Canada: Seasonal closures and restrictions: the Minnewanka Loop Road and other seasonal restrictions.
- Parks Canada: Driving in Banff: winter tire rules and Alberta 511.
- Parks Canada: Recreational drone prohibition: drone restrictions.
- Rocky Mountain Photo Adventures: Banff workshops: year-round private landscape instruction.
- Rocky Mountain Photo Adventures: Three Peaks workshop: winter landscape locations.
- Dani Lefrancois: Private photography workshops: customised guided photography.